CNC Router

Fox Head Sign

Our Fox & Hounds Restaurant project included several sculpted trees. A sign hangs from a branch in one of these trees.

As a first step in creating the sign, my father opened the driftwood bitmap from our Texture Magic: Classic Collection in Photoshop.

Then he used the warp tool to shape the bitmap into a gentle 'S' curve.

Once he was happy with the texture, he traced an outline with vectors and then imported them (and the modified bitmap) into EnRoute.

He also opened, copied and pasted the fox medallion he had previously completed. He resized it and added some shoulder pieces to make the sign flow. He added a sandblasted woodgrain texture to the shoulders.

My dad also created a separate relief for the lettering border and added some domed lettering.

Finally, he created a second copy of the sign and flipped it before adding the lettering to each side. (This way the two sides fit together to form a double sided sign.)

As you can see, the sign routed up quite nicely.

See you next week!

Fox Head Barrel

As part of the design process for our Fox & Hounds Pub project, we created a few samples. These pieces also helped to ensure the contractor and trades were on the same page and knew what to expect from us. Our first sample was a fox medallion.

My father created the vectors for the barrel in EnRoute and then used the jigsaw tool (pictured below) to create the staves of the barrel.

He created the outer ring and the barrel top first. (As usual) he used the render button to double check his work.

Then dad selected the outer staves of the barrel and built each one separately (with slight variations in height). As usual, he created each one as a separate relief.

Then he imported the sandblasted wood grain bitmap (from our Texture Magic: Classic Collection).

Since bitmaps can't be rotated inside of EnRoute, dad selected everything else and rotated the reliefs to apply the textures to the barrel staves. At this point everything was merged together for form one relief.

To create the fox, dad used a stock STL file. He resized and positioned it before merging it to the barrel top he had created previously.

And just like that it, was ready to tool path and send off to the CNC router.

G Street - Part 1

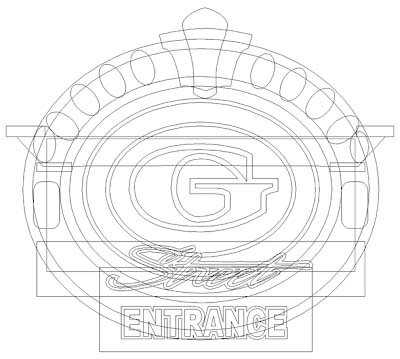
Jack Niemann's Black Forest Steakhouse needed a second sign for the handicap accessible entrance. Obviously, Jack wanted the sign for the “G Street” entrance be be done in the same style as the first sign. My father’s first step was to create the sign’s vectors in Illustrator - a vector program he is very comfortable with.

Then he imported the vector file into PhotoShop and quickly created this illustration with his digital pen and drawing pad to show Jack what he had in mind — he gave his instant approval.

With Jack’s approval in hand dad imported the vectors into EnRoute and began the task of building the routing file.

He could have used the “sweep two rails” tool to build the crown moulding, but opted to build each element separately and then merge them together at the end for maximum flexibility. Since the vectors were separated into groups, he used the “jigsaw” tool to cut out the shapes and then merged them together.

Then dad used the “bevel relief” tool to create a relief twice as wide as he needed before he merged (merge highest) a zero height relief (of the correct shape) to it to create the final shape he needed.

The top and bottom flat portions of the crown were done in a similar fashion using the “jigsaw” tool.

Then he made the egg shaped reliefs and merged highest to the crown molding.

Once the balance of the reliefs were created, dad merged them together to form the sign. He duplicated and flipped one of the reliefs to make sure the two halves matched perfectly. before adding the G to each side as a beveled letter.

He divided the sign into six pieces to be routed from 2" thick 30 lbs. Precision Board HDU.

Here it is on the CNC table, being routed.

See you next week for Part 2 of the G Street sign series!